Shotgun Forum banner

Champion Workhorse

6.1K views 53 replies 10 participants last post by  sledman8002002  
#1 ·
Since my old Champion Wheelybird update/upgrades turned out so well, I've been looking into adding another thrower to raise the 'game' in the back 40 even higher so to speak.
With the recent Black Friday sales of a buck twenty off I couldnt help but order up Champion's Workhorse model.
However, I have no intention of using the stand that comes with it (as pictured)...

Image


Instead I'll be using the original mounting bracket from my old Wheelybird and building an entirely new frame.

Image


I removed the oscillator setup from my old frame and cut it up but kept the axle assembly as it is. I'm in the process of looking into making this frame incorporate an angle tilt so as to throw a curling target similair to what I've seen from a couple of members here on the site do with their Wheelybirds.
Problem right now is I'm lacking the 3/16" steel plating in my scrap pile so I'm going to have to get it from the city next time I'm down that way in a few months time.
'Unless' I can find what I need from the steel pile of one of my buddies.

This is basically where I'm at at the moment. I have in my mind two possible ways to go with the angle function, I'm only going to have it angle in the one direction.
I may do something temporary using angle iron and some odds and ends until I get the steel plate(s) I want.

Image
 
#2 · (Edited)
As you can see the Wheelybird mount bracket bolts right up to the Workhorse with no modifications. My shop space is at a premium at the moment, so I have the thrower in my basement for the time being.
In the near future it too will sport the Champion remote system which I'll match/pair up to my other remote on the Wheelybird. I'm hoping for an X-mas sale...

Image


One other upgrade I will be doing, (just like I did when I brought home my 10 year old Wheelybird), I'll be making a new aluminum horsehoe retainer for the top of the magazine. I just dont trust the flimsyness of the plastic one it comes with. However I've yet to ever hear of one breaking...

Image


Another upgrade...
I happened across some thumbwheel bolts which are/will be perfect for doing quick adjust elevation changes for the Workhorse. (I think we all know, the wrench is kind of a PIA for changes in the field).
As an FYI the bolt threads on both the Wheelybird and the Workhorse mounts are M10 x 1.5 thread pitch. These ones are an inch in length, but 3/4 inch would be plenty sufficient if you end up searching for some.

May '24 Update Edit...I cant in good conscience endorse the thumbwheel bolts any longer. No matter how tight or the added lock washers used, hand tightening of these bolts were sadly a fail for me. One or two would loosen up at approx the 20 bird mark every time which changed/maxxed the elevation at inoppertune times.
Hence I reverted back to the original factory bolts and carrying the 5/8" wrench...

Image

Image
 
#50 ·
I happened across some thumbwheel bolts which are/will be perfect for doing quick adjust elevation changes for the Workhorse. (I think we all know, the wrench is kind of a PIA for changes in the field).
Just an update...I've given up and removed the thumbwheel bolts for quick elevation changes as no matter the washers I used (or didnt), no matter how tight I turned them (by hand) one or two would loosen itself around the 20 bird mark and the elevation would climb to it's max setting.
That got old in short order so I removed them and went back to the original 4 bolts and using a 5/8" wrench. I'm thinking 4 'Levered' style bolts might be viable tho...

Image
 
#3 ·
Nice :) I have a Workhorse as a secondary trap but don't use it much because I'm so used to the immediate release from my Atlas trap the workhorse throws my timing off taking so long after call pull before it throws.
 
#4 ·
For anyone following along, I took some spare time and welded up the frame, threw some paint on it while it was still warm and bolted the mount in place, consider it temporary.

Image


Until I get the material I want to use for the angle tilt fabrication, this is about as far as I'll get with it for the next while. No big rush, I'm not much for clay shooting during the winter/snow months anyway.

I'm going to be keeping an eye out for an in-expensive larger wheel package in the 12-16" region to help offer a little more angle once its all said and done.

I now have the Champion remote on its way thanks to a surprise flash sale/free shipping from Cabela's (y) Once I get that, I'll do the same as I did with the Wheelybird/Wobbler unit and weld a somewhat tall stand-alone post for remotes receiver on the frame.

Image

Image
 
#16 ·
Will the 12" wheels go directly onto existing axle without interfering with throwing arm when in a fully down position?
Yes, no issues at all clearance wise. I just went and measured, with the 8" wheel on it now, there is 6" from the top of the wheel to the hoop. From the center of the axle to the hoop, 10".
The throwing arm (on mine anyway) is 2" above the designated path of the hoop so you can add another 2" to the above measurements.

When I create the angle tilt, I'll then have to be sure there is no chance of interference to the arm and hoop.
 
#32 · (Edited)
Thanks Bob, appreciate it (y)
There are several on Amazon. More than $10 but will get here faster. Not sure how I broke it so a spare is in order.
Edit: it’s an SMA-female connection. New antenna will be here in a couple days
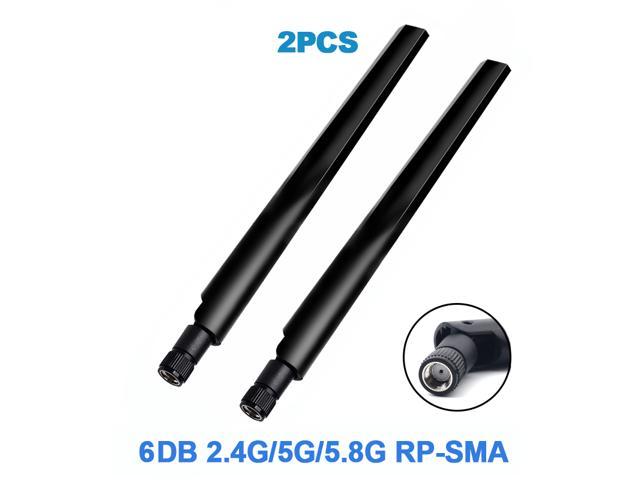
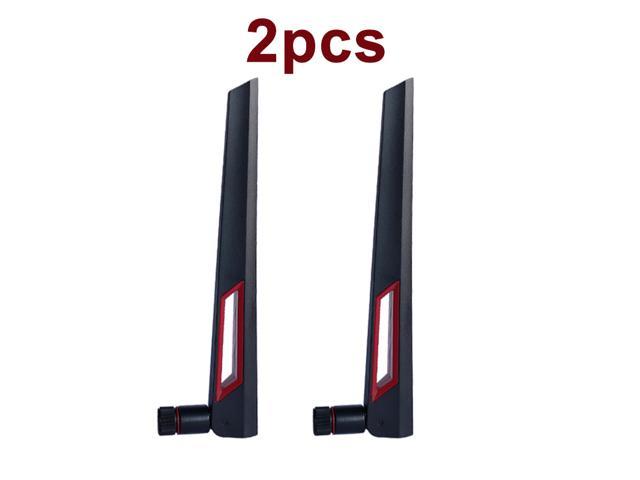
It's funny (in a way...), ever since you mentioned breaking yours, 3 times now I've been close to doing the same dbh! So in advance of what seems bound to happen I'd like to have an extra or two, I've had a struggle contacting Champion but 'may' have found an antenna that might work? (link below)

@dbh1956 or @Mtbkn, can either of you by chance confirm if this cheap antenna would be a viable option? It looks to be OK to me but doesnt have the metal female thread as the original. That may be needed as a grounding element?


Image
 
#25 ·
Bit more progress on the Workhorse this afternoon due to the new 12" wheels which were surprisingly delivered yesterday, wasnt expecting them until next week.
I had to mod the axle shaft a wee bit as the hubs needed 3/16" more of the shaft than what was available. Easy enough tho, using a cutoff wheel/disc on my mini grinder I trimmed 3/16" of angle iron from the 1/2" axle to expose that much more of the shaft for the new wheels.
All good, I really like these ones. They roll even easier than the new 8" bearing models I put on the Wheelybird. Impressive. (y)

To add, I had cut up some thin wall 1" sq tubing to fab up a handle a coupla days ago. Got that welded up today and also an anchor point on the main frame same/similair as I had done previously on both of the Wheelybird frames.

Being a balmy 20F this afternoon, I figured I'd best throw some paint on what I needed to while I could with the material still warm from any welding. I'll get a pic or two tomorrow once dry and can finish up with where I'm at.

Image

Image

Image
 
#27 ·
Been a while, thought I'd give an update. I have aquired what I figure are all the necessary items to complete the left(?) angled thrower modifications.
However, its cold(!) and my outdoor welding bench is constantly snow covered so it'll be a month or likely 2 before I can/will complete.

I did do one mod to the thrower that could be of interest tho...Unlike the Wheelybird 1.0 I have, one thing that didnt impress me with this Workhorse is the somewhat loose fitting magazine tube sleeves on the aluminum stud inserts. I 'think' it'd be just fine for the straight away use, but for the somewhat extreme angle I plan on trying/using I'm about sure the mag rack might just pop off when fired while full of clays. Aint no one wants to see that! (Especially me...)

As said, I cant say for sure but just for preventative measure I drilled and tapped for some allen key set screws on all four sleeves. (Yes, the set screws are a tad long but I already had them in the drawer, no worries).
Once the thrower is fully complete I'll locktite them in place, for now they're not as I'll be removing the mag stack likely numerous times between now and completion. After that it wont matter as I've no need to remove the stack for simple storage.

Quick pic to show/help explain my meaning...

Image
 
#34 ·
OK, thanks. I've found a few others on Amazon and another site that do have the metal threaded insert so I'll lean that way. They're not very expensive so I'll experiment with a few. The one thing that I find confusing is the dBi numbers?
Examples below, one is a 6 while the other has a 10. Does it matter you think? Both examples are for routers, both mention those numbers as 'gain'. I know nothing to what that refers, I wonder if it's a distance thing? Higher the better?

 
#38 ·
My antenna order came in yesterday, here's a couple pics.
No I havent tested for use as yet as I'm busy dealing with other must-do chores. I did however test for fit and they all passed that test.
In the photo below you'll see all 3 aftermarket antennas with the receivers and an un-mounted factory Champion antenna on the right.
The unmounted left hand model is identical in size and length to what comes with the receiver.

Image


The only noticeable question mark I have is the aftermarket antenna (left) not having the metal threaded insert vs the Champ's on the right as seen below...(The other two aftermarkets both have it)
Testing will be the tell-tale. I hope they all work, at least to some degree.

Image
 
#42 ·
Will be interesting to see your results.
Update...I spent a few minutes doing an antenna test yesterday afternoon. Very happy to report each and every one of the antennas performed exactly as the factory original. (y)
I tested using both throwers ranging in distances from right next to them out to 75-80 yards and also thru a tree line. All good, even the short and the odd shaped fat one. :)

Image
 
#45 ·
So what atenna(s) did you end up ordering?
These are the 3 units purchased. Make note, the links are Amazon Canada...